
Bus rental safety checklist for event planners
TL;DR:
- Thorough bus safety inspections and proper documentation are crucial to prevent accidents and ensure passenger safety. Event planners must verify rental companies’ certifications, driver qualifications, maintenance records, and use digital DVIR systems for compliance. Consistent oversight during and after travel helps maintain safety standards and protects against liability.
When you are responsible for moving dozens of people, whether it is a corporate team, a school group, or wedding guests, the stakes of getting the transportation wrong are not just logistical. Proper inspection and documentation prevent roughly 14,000 accidents yearly, which makes following a thorough bus rental safety checklist far more than a box-ticking exercise. This guide gives event planners, corporate coordinators, and school administrators a clear, regulation-aware framework covering what to verify before, during, and after bus rental to protect every passenger on board.
Table of Contents
- Key takeaways
- Your bus rental safety checklist starts here
- Step-by-step pre-trip inspection process
- Understanding DVIRs and post-trip requirements
- Common pitfalls in bus safety inspections
- Verifying safety during and after your event
- My take on where bus safety checks actually break down
- Safe, verified group travel with Torontobusrentals
- FAQ
Key takeaways
| Point | Details |
|---|---|
| Verify credentials first | Confirm company certifications, driver licences, and vehicle records before signing any agreement. |
| Use the 7-zone method | Walk through all seven inspection zones to catch every critical defect before departure. |
| Understand DVIR requirements | Post-trip Driver Vehicle Inspection Reports must be completed daily and retained for at least three months. |
| Prioritise brakes, tyres, and lights | These three systems account for most out-of-service orders at roadside inspections. |
| Go digital when possible | Electronic inspection records provide GPS timestamps, photo evidence, and stronger legal defensibility. |
Your bus rental safety checklist starts here
Before you ever board a vehicle, the groundwork you do at the booking stage determines how smoothly the rest of the process goes. Think of this phase as your paper-based safety net. The industry term for the overall framework is a pre-trip inspection programme, and it exists because federal rules require drivers to personally confirm vehicles are in safe operating condition before each run.
Here is what you need to confirm before the rental company shows up at your venue:
- Company safety certifications. Ask for proof of current operating authority, commercial carrier permits, and any provincial or federal safety ratings. A reputable provider will share these without hesitation.
- Driver qualifications. Verify that every assigned driver holds a valid commercial driver’s licence appropriate for passenger vehicles. Confirm the company has documented drug and alcohol testing programmes in compliance with applicable regulations. Driver satisfaction with vehicle safety before operation is a legal mandate, not just company policy, so your driver must be trained to take this seriously.
- Vehicle maintenance records. Request documented service history for the specific bus you are renting. Look for records of brake services, tyre replacements, and any flagged defects from previous inspections.
- Insurance and liability documentation. Confirm the rental agreement includes adequate passenger liability coverage. Review what the rental guidelines say about responsibility in the event of a mechanical failure.
- Clear communication of expectations. Spell out your pick-up times, passenger count, route, and any special needs in writing. Ambiguity at this stage creates pressure on the day of travel that can rush inspection processes.
Pro Tip: Ask specifically whether the company uses electronic Driver Vehicle Inspection Reports. Providers with digital systems tend to have more auditable safety records, which matters if a compliance question arises after your event.
Step-by-step pre-trip inspection process
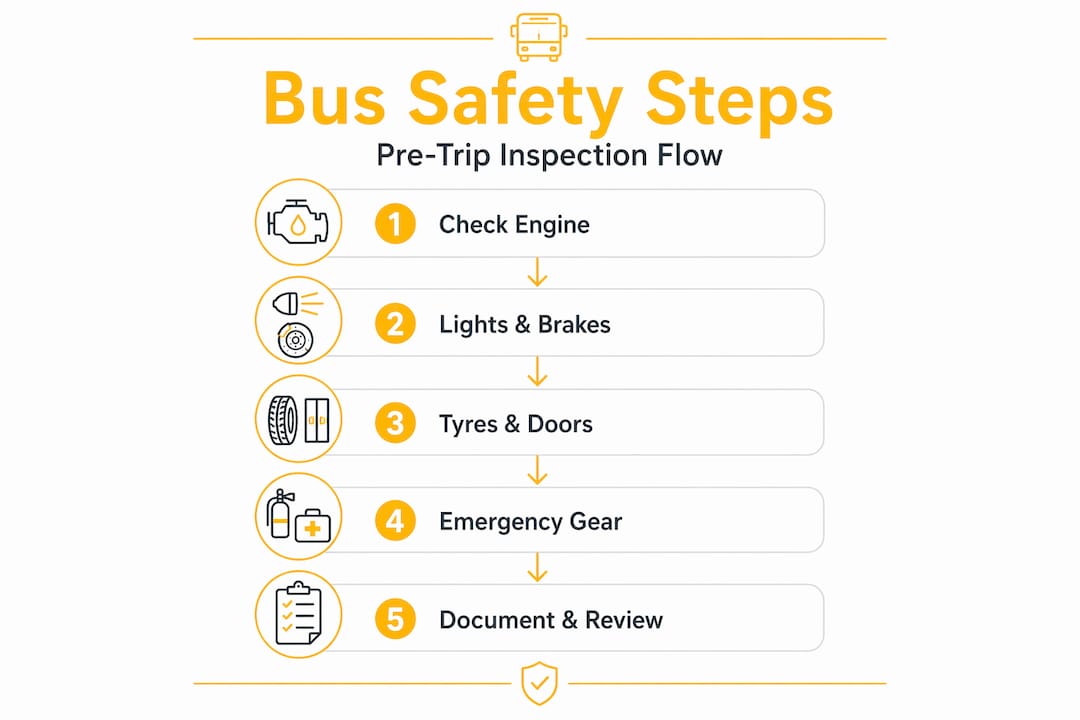
A thorough pre-trip inspection is the heart of any bus safety inspection guide. The 7-zone walkaround method organises the process so nothing critical gets missed. While the driver holds primary responsibility for completing the inspection, understanding the process lets you ask the right questions and recognise red flags.
Here is how the zones break down in sequence:
- Approach and overview. Look at the vehicle from a distance. Check for obvious body damage, fluid leaks on the ground, and tyre condition from all angles.
- Engine compartment. Inspect fluid levels, belts, hoses, and battery connections. Look for signs of leaks or corrosion.
- Driver’s cab. Test the horn, check mirrors for correct positioning, verify seatbelts, and confirm the emergency brake engages properly.
- Front of the vehicle. Inspect headlights, turn signals, and the windshield for cracks. Test steering play and check the front tyres for tread wear and proper inflation.
- Left side exterior. Walk along the left side checking tyres, fuel tank caps, and body panels. Listen for air leaks if it is an air-brake system.
- Right side exterior. Mirror the left-side checks. Pay attention to the rear wheels, particularly on vehicles with dual tyres.
- Interior and emergency equipment. Walk the passenger compartment. Confirm emergency exits open freely, check fire extinguishers are charged and accessible, and verify first-aid kits are stocked. Emergency equipment checks are often overlooked compared to mechanical checks, yet they are equally critical for passenger safety.
| Inspection zone | Key items | Pass indicator |
|---|---|---|
| Engine compartment | Fluid levels, belts, battery | No leaks, belts intact, terminals clean |
| Brakes | Air pressure, brake pads, lines | Full pressure, no wear warnings |
| Tyres | Tread depth, inflation, sidewalls | Minimum tread met, no bulges or cuts |
| Lighting | Headlights, signals, brake lights | All functional, lenses uncracked |
| Emergency equipment | Extinguisher, exits, first-aid kit | Charged, unobstructed, fully stocked |
Brakes, tyres, and lighting are the top three focus areas for roadside inspectors, and they are where most out-of-service violations originate. Knowing this lets you prioritise your questions when reviewing the driver’s completed inspection report.
Pro Tip: Take photos of the completed inspection form and the vehicle before departure. This takes two minutes and creates a timestamped record you can reference if any damage disputes or safety concerns arise after the trip.
Understanding DVIRs and post-trip requirements
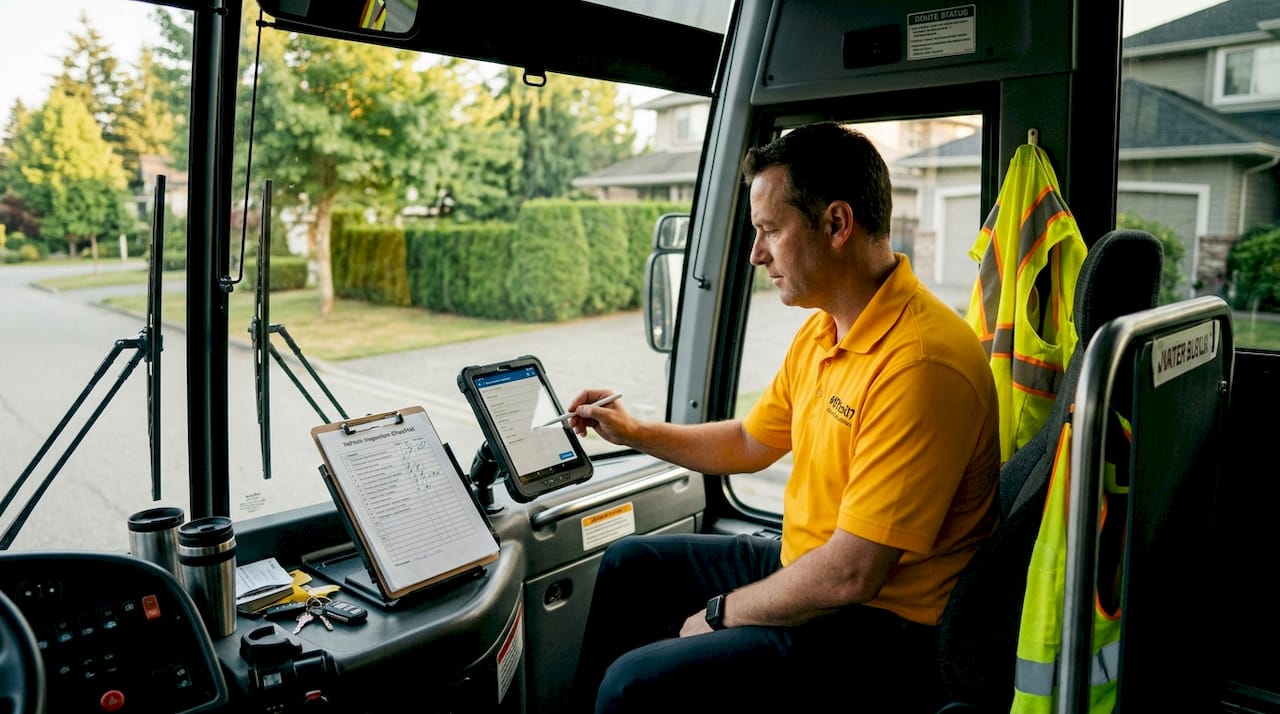
There is an important distinction between the physical walkaround inspection and the written record that follows. A Driver Vehicle Inspection Report (DVIR) is the formal documentation piece. A DVIR is required every workday for passenger-carrying vehicles, documenting any defects found during or after operation.
Separating physical inspections from DVIR documentation reduces confusion between operators and planners. The walkaround is what the driver does with their eyes and hands; the DVIR is the written record that makes the inspection legally defensible.
A compliant DVIR must include:
- The date and time of inspection
- The vehicle’s identification number and odometer reading
- A list of any defects found, or a statement that no defects were found
- The driver’s signature certifying the report’s accuracy
- A mechanic’s certification if repairs were made and a note from the next driver confirming they reviewed the report
Post-trip inspections focus on areas that operational use affects most: brake performance, tyre condition after highway kilometres, and any passenger-reported issues. The chain of accountability runs from the driver’s post-trip signoff through the carrier’s repair certification to the next driver’s pre-trip review.
Record retention is non-negotiable. DVIRs must be kept for a minimum of three months. For event planners managing school or corporate transportation contracts, asking the rental provider to supply copies of post-trip DVIRs is a reasonable and protective request. It creates an audit trail that supports your liability position if anything is ever questioned later.
Electronic DVIR systems, which the FMCSA formally authorised in 2026, add GPS timestamps and photo attachments to each report. This level of documentation significantly strengthens your compliance and legal defensibility compared to paper records.
Common pitfalls in bus safety inspections
Even experienced coordinators make the same avoidable mistakes. Here is where things typically go wrong:
- Skipping the pre-trip because the driver “always does it.” The driver does have primary accountability, but assuming they completed the inspection without any documentation is a compliance gap. Undocumented or incomplete inspections can result in fines approaching $30,000 per day for carriers who dispatch unsafe vehicles.
- Overlooking emergency systems. Fire extinguishers and emergency exits are frequently passed over during daily inspection routines. Frequent emergency system checks are mandated for good reason. A blocked exit becomes a crisis during an evacuation.
- Confusing driver and coordinator roles. You are not expected to certify the vehicle, but you are responsible for confirming the inspection was completed and documented. Misunderstanding this distinction leads to coordinators either over-relying on drivers or, worse, signing off on things outside their authority.
- Poor follow-up on flagged defects. If a driver notes a defect on the pre-trip form, that vehicle should not move until it is repaired and certified. Pressure to meet event timelines sometimes results in deferred repairs. Do not let schedule pressure override this step.
- Keeping only paper records. Paper reports get lost, smudged, or disputed. Digital tools that create time-stamped, role-based workflows are worth requiring from your rental provider.
Pro Tip: Build a group transportation safety review into your event planning timeline, not as an afterthought. A 15-minute briefing with the driver before departure covers expectations, confirms the inspection is complete, and signals to everyone involved that safety is taken seriously.
Verifying safety during and after your event
Your responsibility does not end once the bus pulls away from the venue. Ongoing oversight throughout the event keeps safety standards consistent and gives you documentation you may need later.
Key practices for the day of travel:
- Establish a single point of contact with the driver. Decide who communicates route changes, timing adjustments, or concerns. Multiple people giving directions creates confusion and distracts the driver.
- Monitor adherence to agreed routes and timing. If you have GPS access through the rental provider’s system, use it. Unexpected route deviations warrant a call to the company dispatcher immediately.
- Document any incidents or passenger concerns in writing. Even minor issues, such as a seatbelt that feels loose or a strange noise reported by passengers, should be noted with the time and location. These notes protect you and prompt proper follow-up.
- Request the post-trip DVIR. After the event, ask the rental company to confirm the post-trip inspection was completed and documented. For multi-day events or school programmes with recurring transportation, build this request into your contract terms.
- Review compliance records annually. If you use the same provider repeatedly, review their transportation compliance records at least once per year. Safety ratings, driver rosters, and maintenance schedules should be updated and available on request.
Aligning your oversight practices with current event transportation safety standards is not overly complex, but it does require consistency. The planners who avoid problems are the ones who treat safety documentation as a permanent part of their event file, not a one-time formality.
My take on where bus safety checks actually break down
I have seen plenty of well-intentioned safety plans fall apart at the same moment: when the timeline gets tight and the inspection gets rushed. The gap between what a paper checklist promises and what actually happens during a 10-minute pre-trip walkthrough is where most real-world compliance failures live.
What I have learned is that pre-trip inspections detect only visible defects. Brake performance under actual load, for instance, cannot be fully assessed by a walkaround. This is why the driver’s accountability matters so much. When a driver genuinely understands they are personally liable for certifying the vehicle’s condition, they do not rush the process. When they see it as paperwork to clear before departure, they do.
The other thing that consistently gets underestimated is the value of building a real relationship with your rental provider. If they know you ask questions, review documentation, and choose safe bus rentals deliberately, they prioritise your jobs accordingly. Providers who field a coordinator who clearly knows what to check in bus rental operate differently than those who deal with clients who never ask.
Digital inspection tools have genuinely changed what is possible here. A timestamped photo of a tyre defect is worth more in a dispute than three paragraphs of handwritten notes. Push your providers toward electronic documentation. The ones resisting that shift are usually the ones with something to hide in their maintenance records.
— Firoz
Safe, verified group travel with Torontobusrentals
Planning a corporate outing, school trip, or large group event in Toronto and want the safety documentation already handled? Torontobusrentals maintains a fleet of modern coaches with professional, fully licensed drivers and documented inspection programmes built into every booking.

Whether you need a 46-passenger coach for a corporate event or a compact minibus for a school group, Torontobusrentals provides vehicles that meet current inspection standards with the paperwork to back it up. The team handles group transportation logistics from pre-trip documentation through to post-trip reporting, so you are not scrambling to verify compliance after the fact. Reach out directly to discuss your event details and get a quote from a provider that takes the safety side as seriously as the scheduling side.
FAQ
What should I always check before booking a rental bus?
Confirm the rental company’s safety certifications, request driver licence and drug testing documentation, and ask for the vehicle’s maintenance records and most recent inspection report before committing to a booking.
What is a DVIR and why does it matter for events?
A Driver Vehicle Inspection Report (DVIR) is a mandatory daily document for passenger-carrying vehicles that records any defects found before or after operation. It must be retained for at least three months and provides critical legal protection for all parties involved.
Who is responsible for the bus pre-trip inspection?
The driver holds primary legal accountability for completing and certifying the pre-trip inspection. As the event coordinator, your role is to confirm the inspection was done and documented, not to perform it yourself.
How do I verify a bus is safe if I am not a mechanic?
Ask to see the completed pre-trip inspection form, confirm emergency equipment is present and accessible, check that lights and tyres appear in sound condition, and request digital inspection records with timestamps when available.
What happens if a defect is found before departure?
Any defect noted on the pre-trip inspection report must be repaired and certified by a mechanic before the vehicle can be dispatched. Do not allow schedule pressure to result in a bus leaving with an unresolved safety issue.
Recommended
- Bus rental safety tips for Toronto events and group travel
- Bus rental checklist for events: guide for Toronto planners
- Bus rental insurance explained: protect group travel in Toronto